
Microscopy series · Tutorial
Better microscope images begin with better setup.
Two people can use the same microscope and produce very different results: one image looks flat and hazy, while the other reveals crisp, well-defined structures. Often, the difference is the time spent adjusting the instrument before observation.
This practical guide takes you through the complete workflow: comfortable positioning, Köhler illumination, condenser alignment, diaphragm adjustment, progression from low to high magnification, oil immersion, and eyepiece adjustment for parfocal viewing.
For routine transmitted-light brightfield microscopy on instruments equipped for Köhler illumination. Control locations and adjustment sequences may vary by model.
1. Start with a stable working position
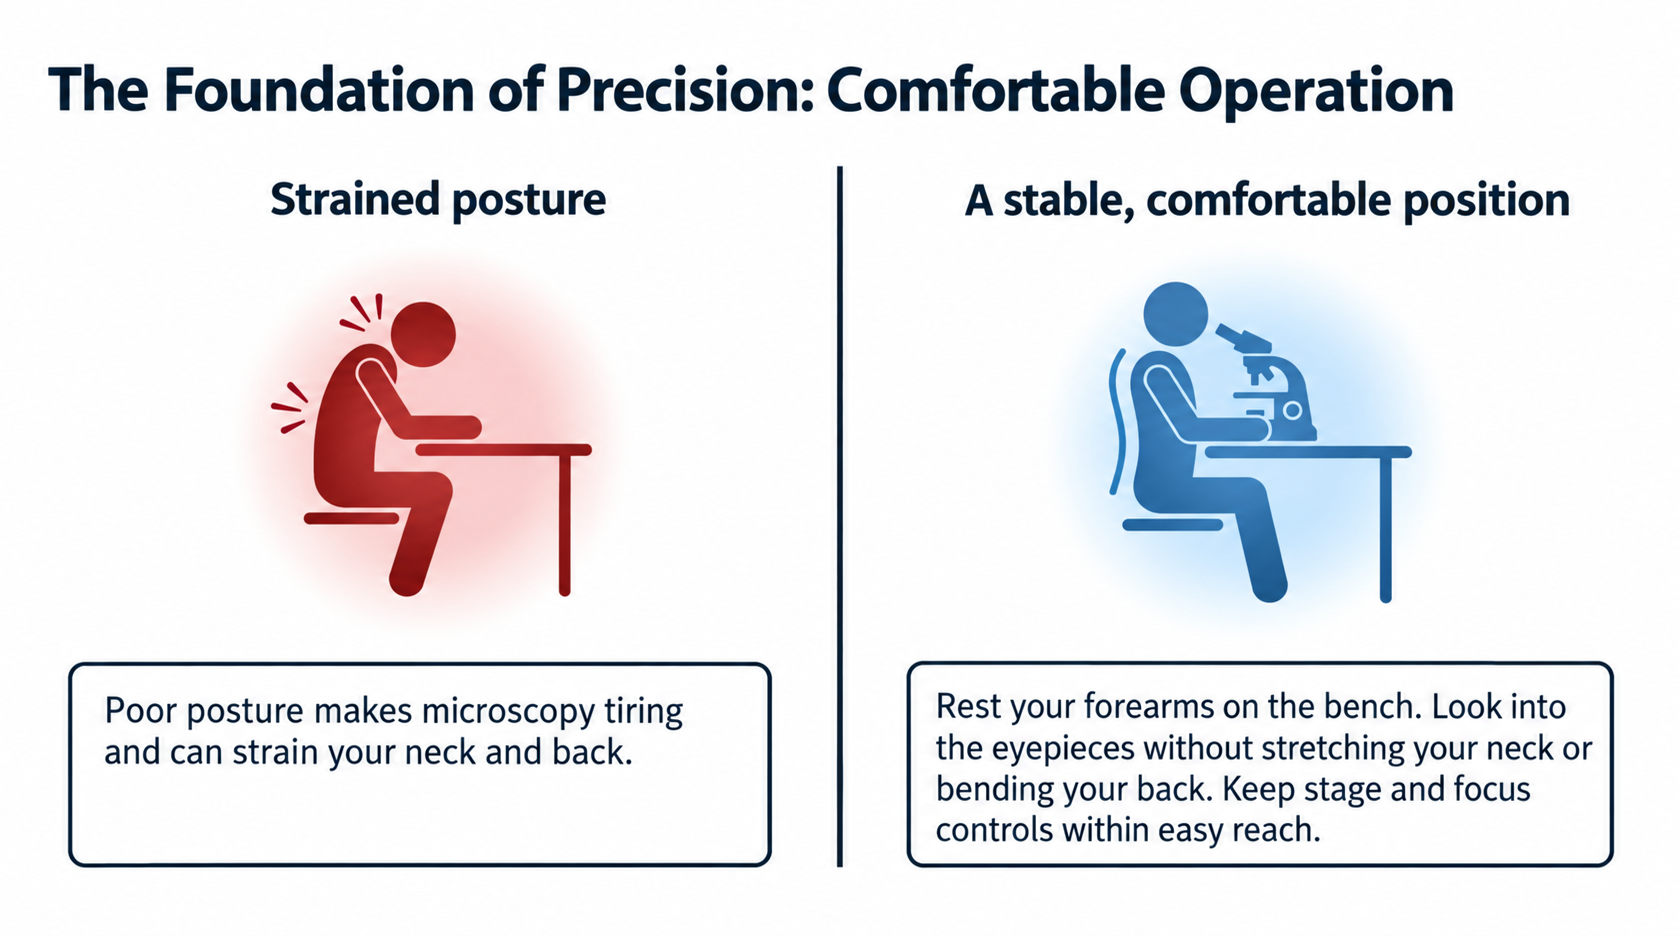 |
The first lesson in good microscope operation is surprisingly simple: sit comfortably. Leaning forward with your neck bent and your arms unsupported makes prolonged observation tiring. It also makes the small, controlled movements needed for precise focusing more difficult.
Adjust the chair, microscope position, and viewing head so you can look directly into the eyepieces without stretching your neck or rounding your back. Rest your forearms comfortably on the bench, relax your shoulders, and keep the stage controls and focusing knobs within easy reach.
A stable posture gives your hands a steady base. Comfortable operation is the foundation of repeatable fine adjustment and better images.
2. Understand what Köhler illumination does
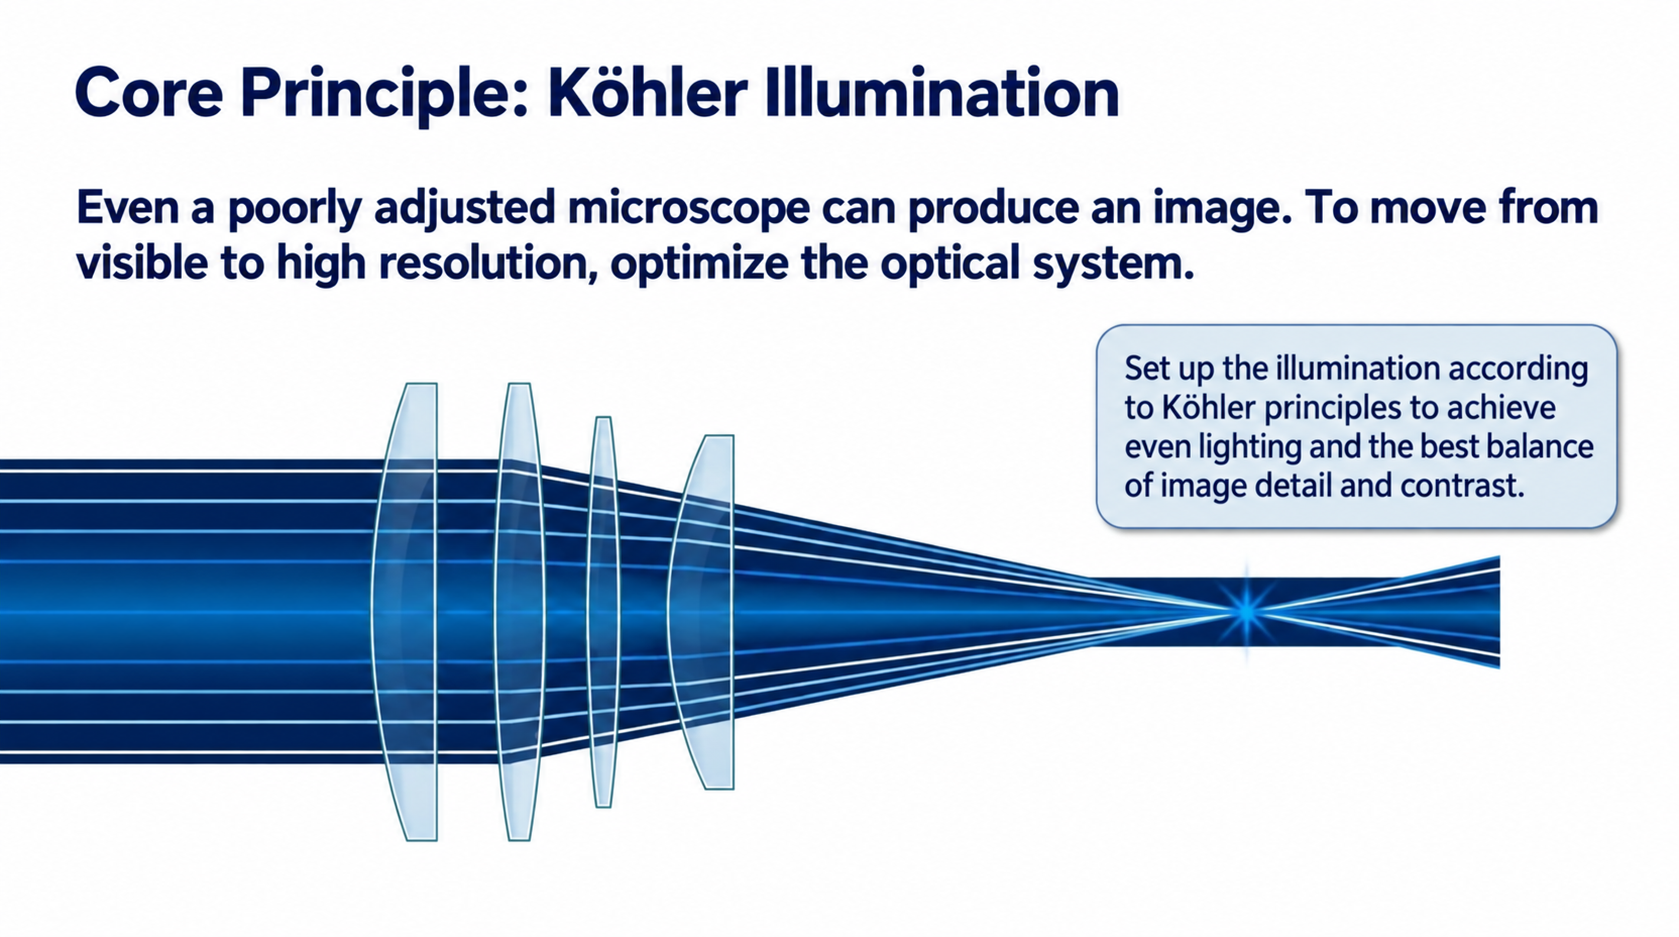 |
A microscope can produce a recognizable image even when its illumination is poorly adjusted. Recognizing a specimen, however, is only the beginning. To reveal fine structure, the illumination system must work in alignment with the imaging optics.
Köhler illumination provides a systematic way to achieve this. Developed more than a century ago, it remains a standard method for transmitted-light microscopy. Correct adjustment produces an evenly illuminated field, limits unnecessary stray light, and helps balance resolution and contrast.
Think of Köhler illumination as part of the normal setup for high-quality observation. Recheck it when the microscope has been moved, cleaned, or reconfigured, and revisit the diaphragm settings when changing objectives.
| Control | What it controls | Practical setting |
|---|---|---|
| Field diaphragm | The area of the specimen illuminated | Open just beyond the edge of the field being observed or recorded. |
| Condenser aperture diaphragm | The angular cone of illumination, affecting resolution and contrast | Match the objective and specimen; inspect the objective’s rear aperture. |
| Brightness control / neutral-density filter | Illumination intensity | Set a comfortable viewing level or suitable camera exposure. |
3. Align the condenser with the optical axis
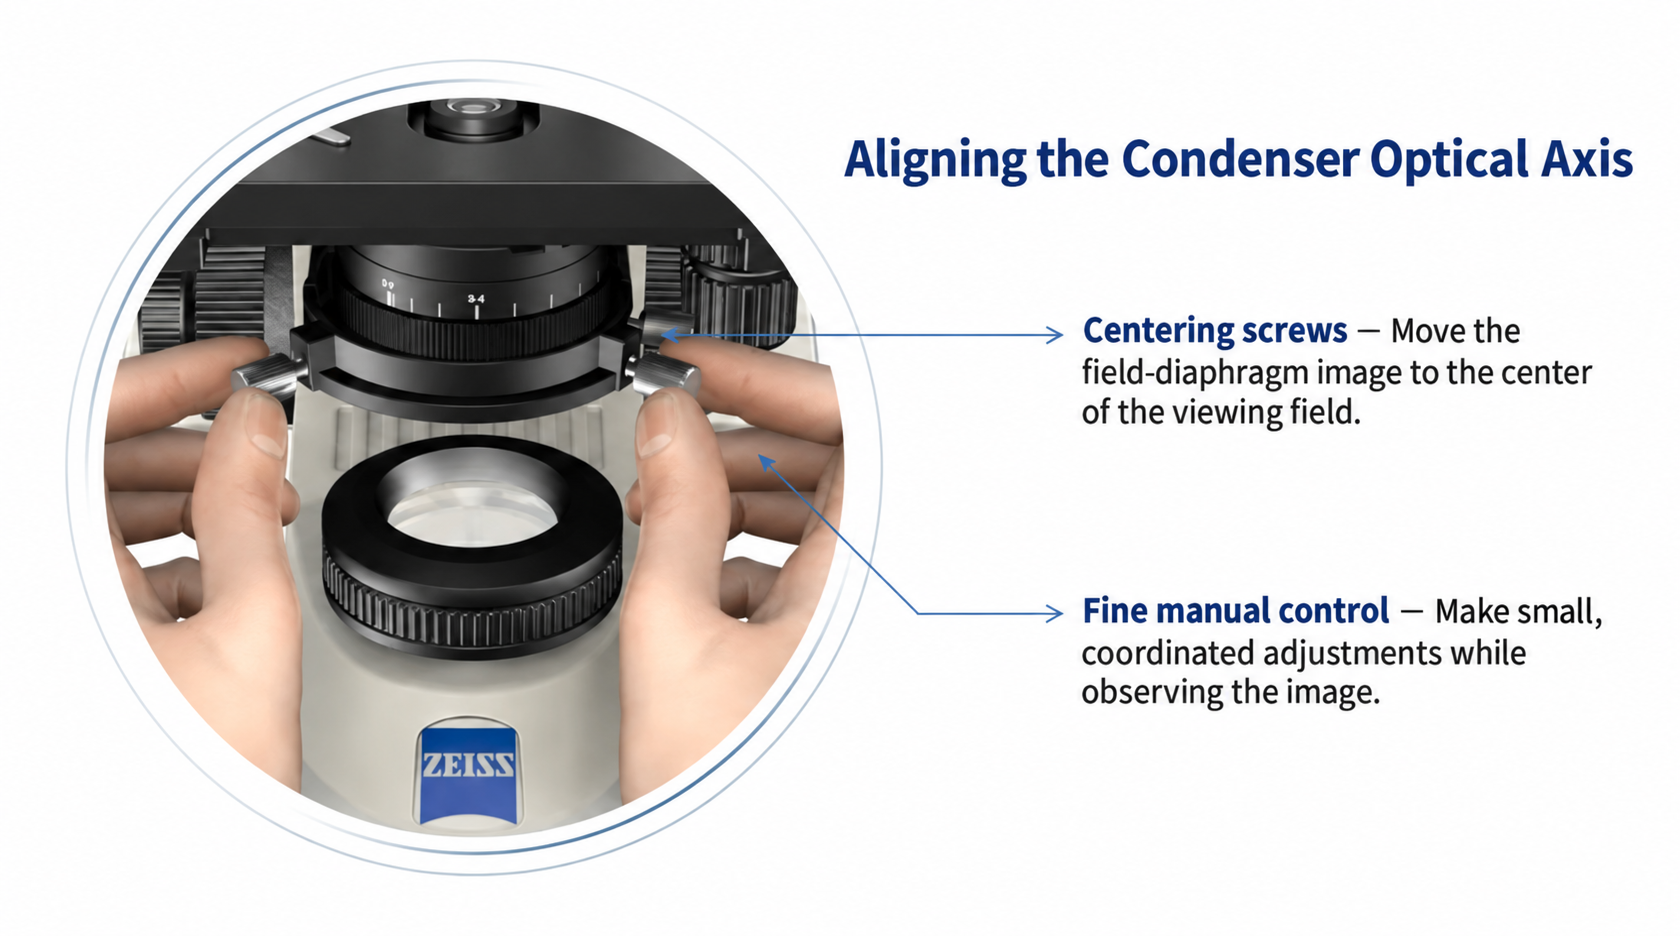 |
The condenser directs illumination through the specimen. For even illumination, its optical axis must be aligned with the microscope’s imaging axis.
The two condenser centering screws are the key controls. Looking through the eyepieces, turn them gently to move the image of the field diaphragm into the center of the viewing field. Small adjustments are usually sufficient; observe the movement as you turn each screw.
Factory alignment should not be treated as permanent. Handling, cleaning, or replacing components can shift the condenser slightly. Checking its position before important observations takes little time and removes a common source of uneven illumination.
4. Köhler setup, stage 1: Prepare and focus the specimen
Prepare the microscope
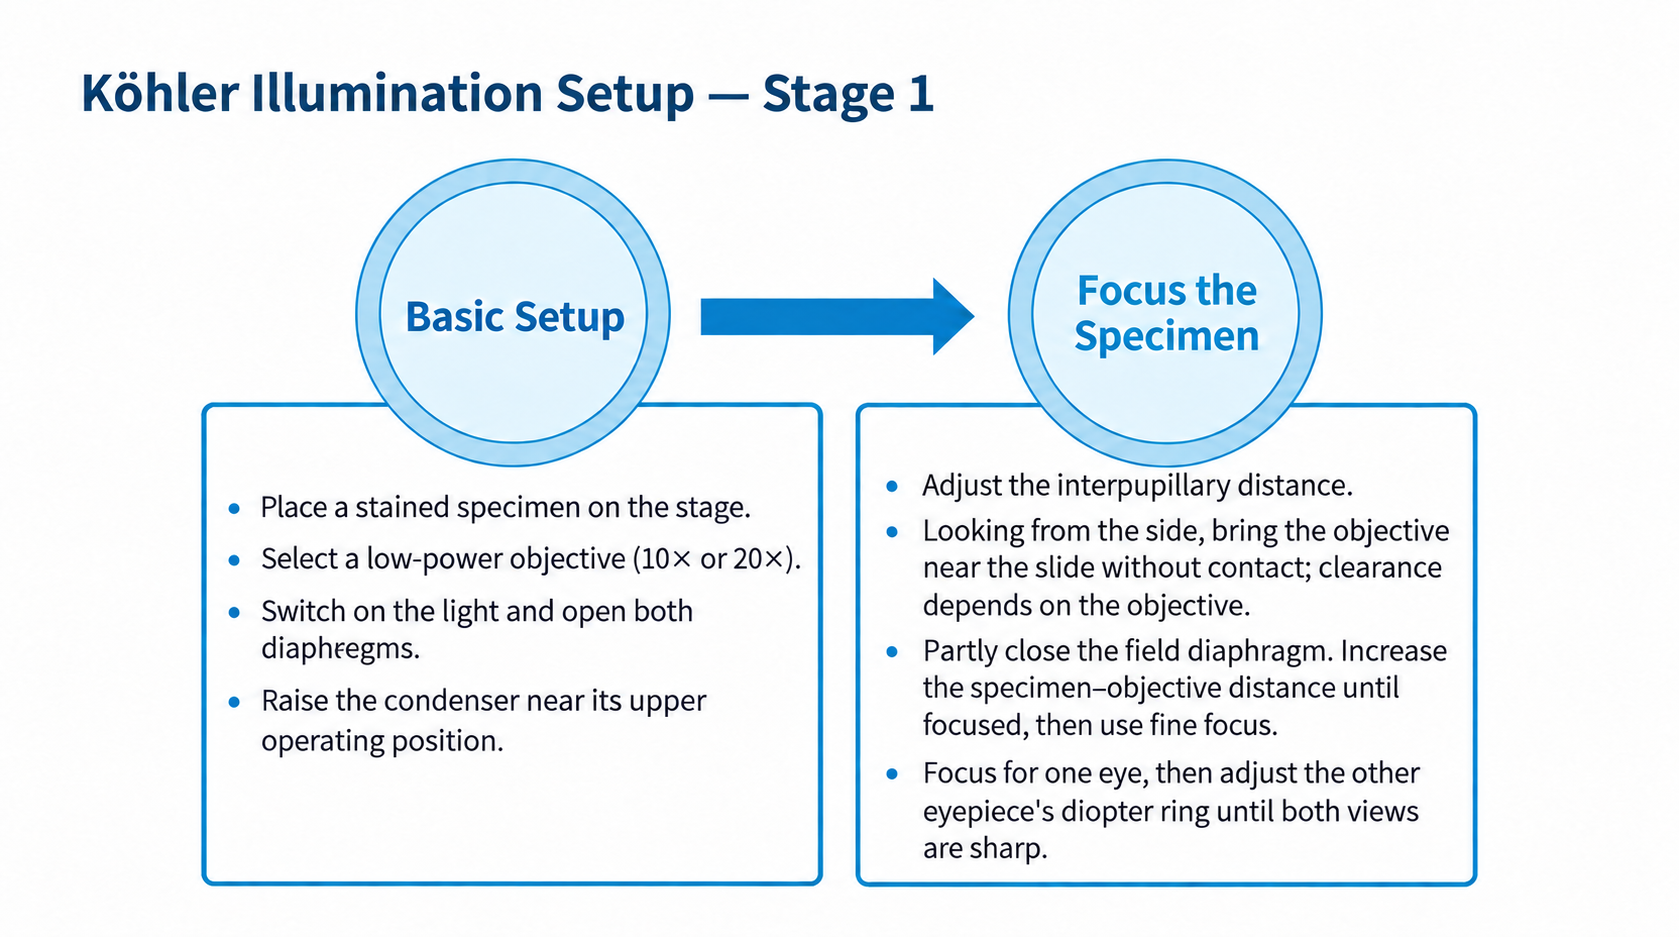
- Place a prepared, stained specimen on the stage and secure the slide.
- Select a low-power objective, usually 10× or 20×, suitable for the condenser’s operating range.
- Switch on the illumination and choose a comfortable initial brightness.
- Open the field and condenser aperture diaphragms.
- Bring the condenser near its upper operating position, keeping it clear of the slide.
Bring the specimen into focus
Adjust the interpupillary distance until the two eyepiece fields merge into one circular field. While looking from the side, bring the objective and slide toward their normal focusing position without allowing contact. The clearance required depends on the objective; a fixed distance such as 5 mm is not appropriate for every instrument.
Then look through the eyepieces and focus by increasing the distance between the specimen and objective until the image appears. Use coarse focus only as appropriate at low power, then finish with fine focus. Partly closing the field diaphragm can help with the subsequent illumination adjustments.
If one eyepiece is fixed and the other has a diopter adjustment, focus the specimen through the fixed eyepiece using the microscope’s focusing control. Without changing that focus, adjust the other eyepiece’s diopter ring until the image is equally sharp for the other eye. Instruments with two adjustable eyepieces may specify a different starting procedure; a further adjustment method is described in Section 10.
 |
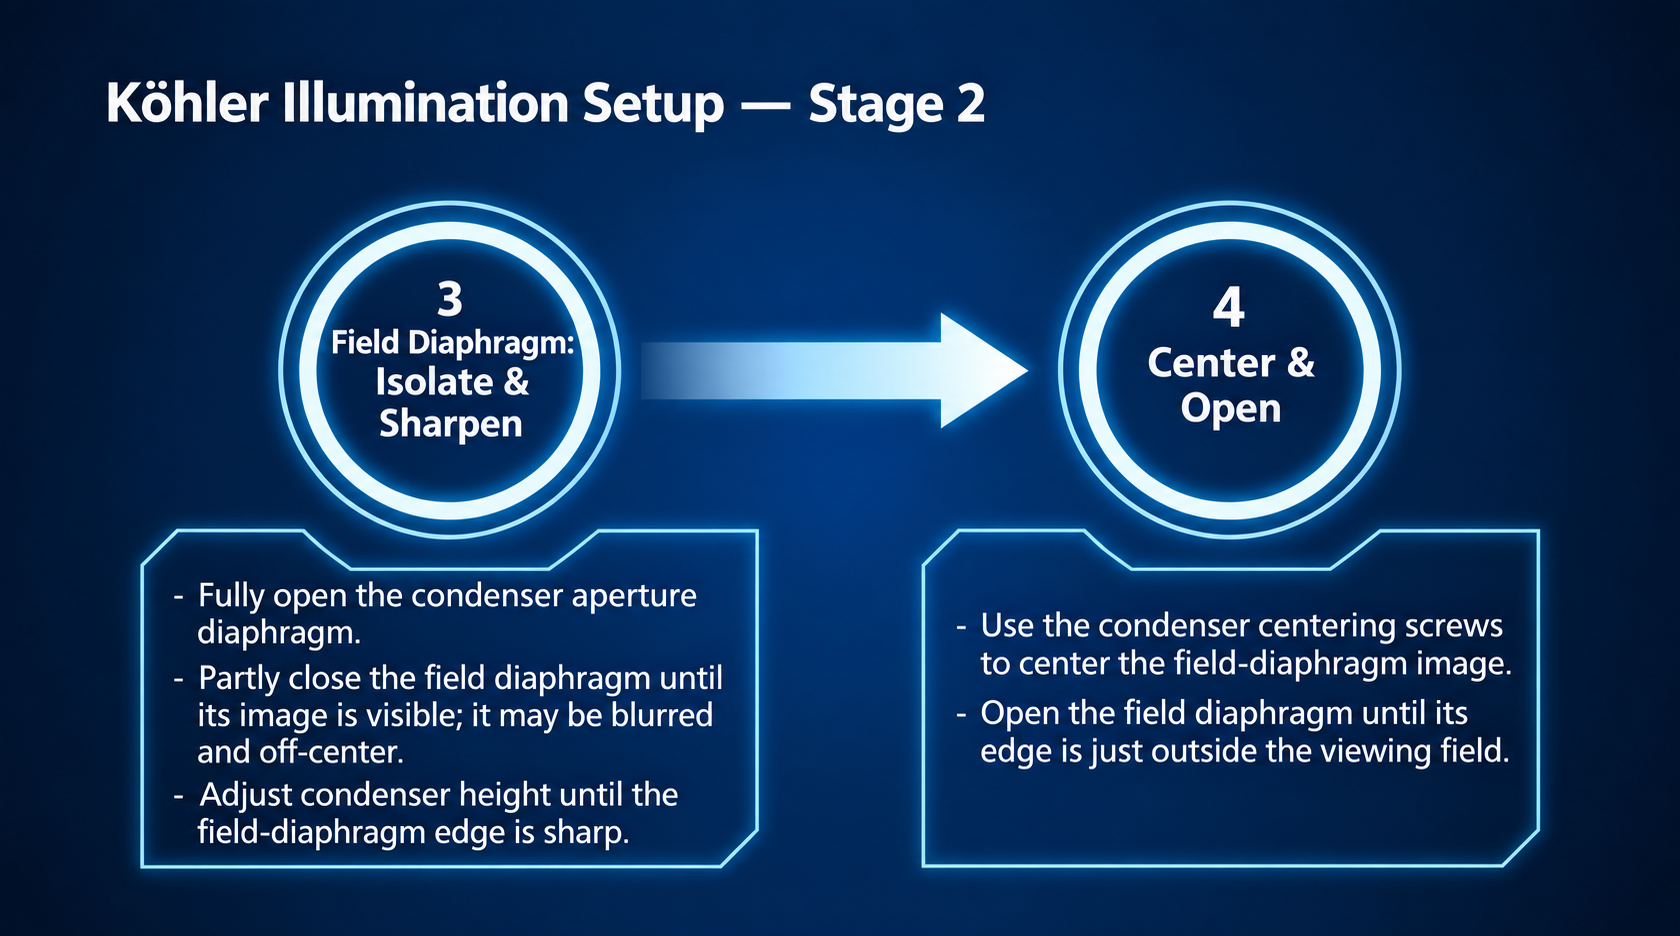
5. Köhler setup, stage 2: Focus and center the field diaphragm
Once the specimen is sharp, adjust the illumination without changing the specimen focus.
- Open the condenser aperture diaphragm. Then partially close the field diaphragm until its edge becomes visible in the viewing field. At first, its image may be blurred or off-center.
- Focus the diaphragm edge. Raise or lower the condenser until the edge is as sharp as possible. A simple Abbe condenser may produce a colored fringe around the edge; this does not necessarily indicate a fault.
- Center the image. Use the condenser centering screws to move the diaphragm image to the middle of the field.
- Open the field diaphragm slowly. Stop when its edge lies just outside the field of view. For camera imaging, ensure that the recorded area is evenly illuminated.
 |
Opening the field diaphragm much farther than necessary illuminates areas that do not contribute to the image and can increase stray light. The goal is to illuminate the area you need, evenly and cleanly.
6. Inspect the rear aperture and set the illumination cone
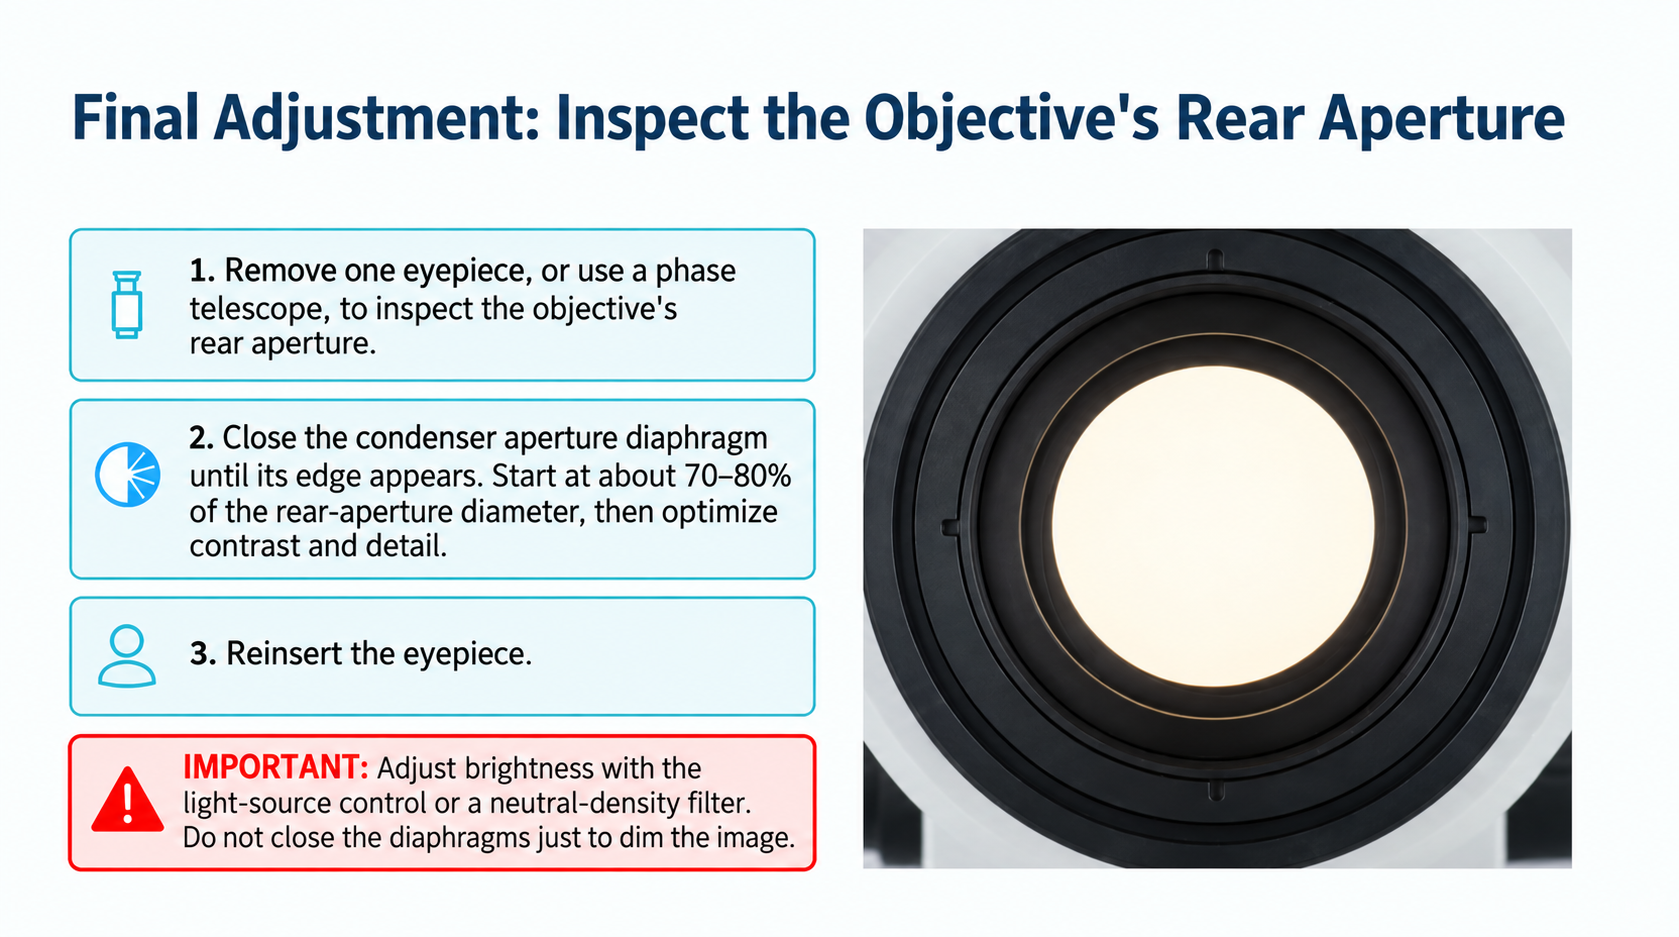 |
The next adjustment is made by inspecting the objective’s rear aperture rather than the specimen image. Remove one eyepiece and look down the tube, or use a phase telescope or Bertrand lens if available. An auxiliary telescope makes the aperture easier to evaluate.
Gradually close the condenser aperture diaphragm until its edge can be seen within the objective’s rear aperture. For routine brightfield work, illuminating about 70–80% of the rear-aperture diameter is a useful starting point. Replace the eyepiece and refine the setting while observing the specimen.
The source tutorial describes a broader 70–90% working range, with approximately 80% as its example. Treat these figures as starting points, not universal targets or percentages of the lever’s travel. The best setting depends on the specimen, objective, and imaging task. Nikon’s explanation of aperture planes describes the commonly used 70–80% compromise.
Control brightness with the light source or a neutral-density filter. Closing the condenser aperture to dim the image also changes the illumination cone and sacrifices optical information. Do not lower the condenser to reduce brightness, either.
7. Move from low magnification to high magnification
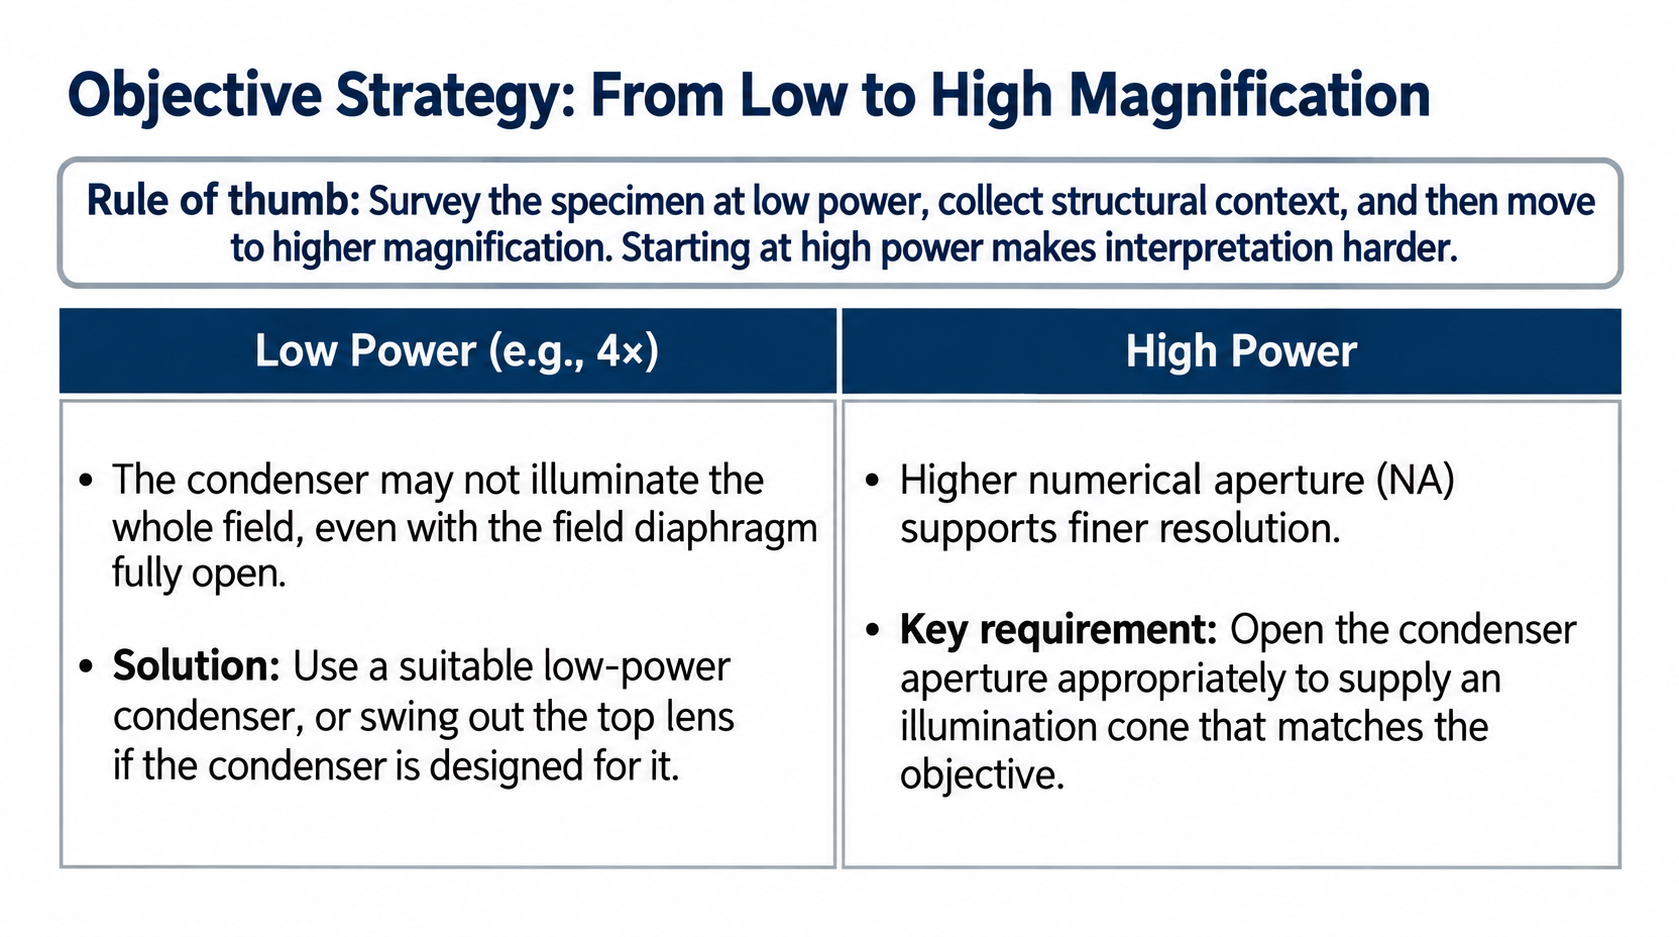 |
Begin by examining the specimen’s overall structure at low power. Locate the region of interest, understand its surroundings, and center it before moving to a higher magnification. Starting at high power can leave you looking at an enlarged fragment without enough context to interpret it.
At very low power, check field coverage
With a 4× objective, a standard condenser may not illuminate the entire field even when the field diaphragm is fully open. If your instrument supports it, use a condenser designed for low magnifications or swing out its top lens. Remove a top lens only when the condenser is designed for that procedure.
At higher power, recheck the aperture
Higher-power objectives often have a larger numerical aperture (NA) and need a wider illumination cone to make use of their resolving power. Open the condenser aperture appropriately, refine the fine focus, and reset the field diaphragm to the new field size. Objective magnification alone is not enough to determine the correct aperture setting; check its NA as well.
 |
8. Diagnose image problems through aperture adjustment
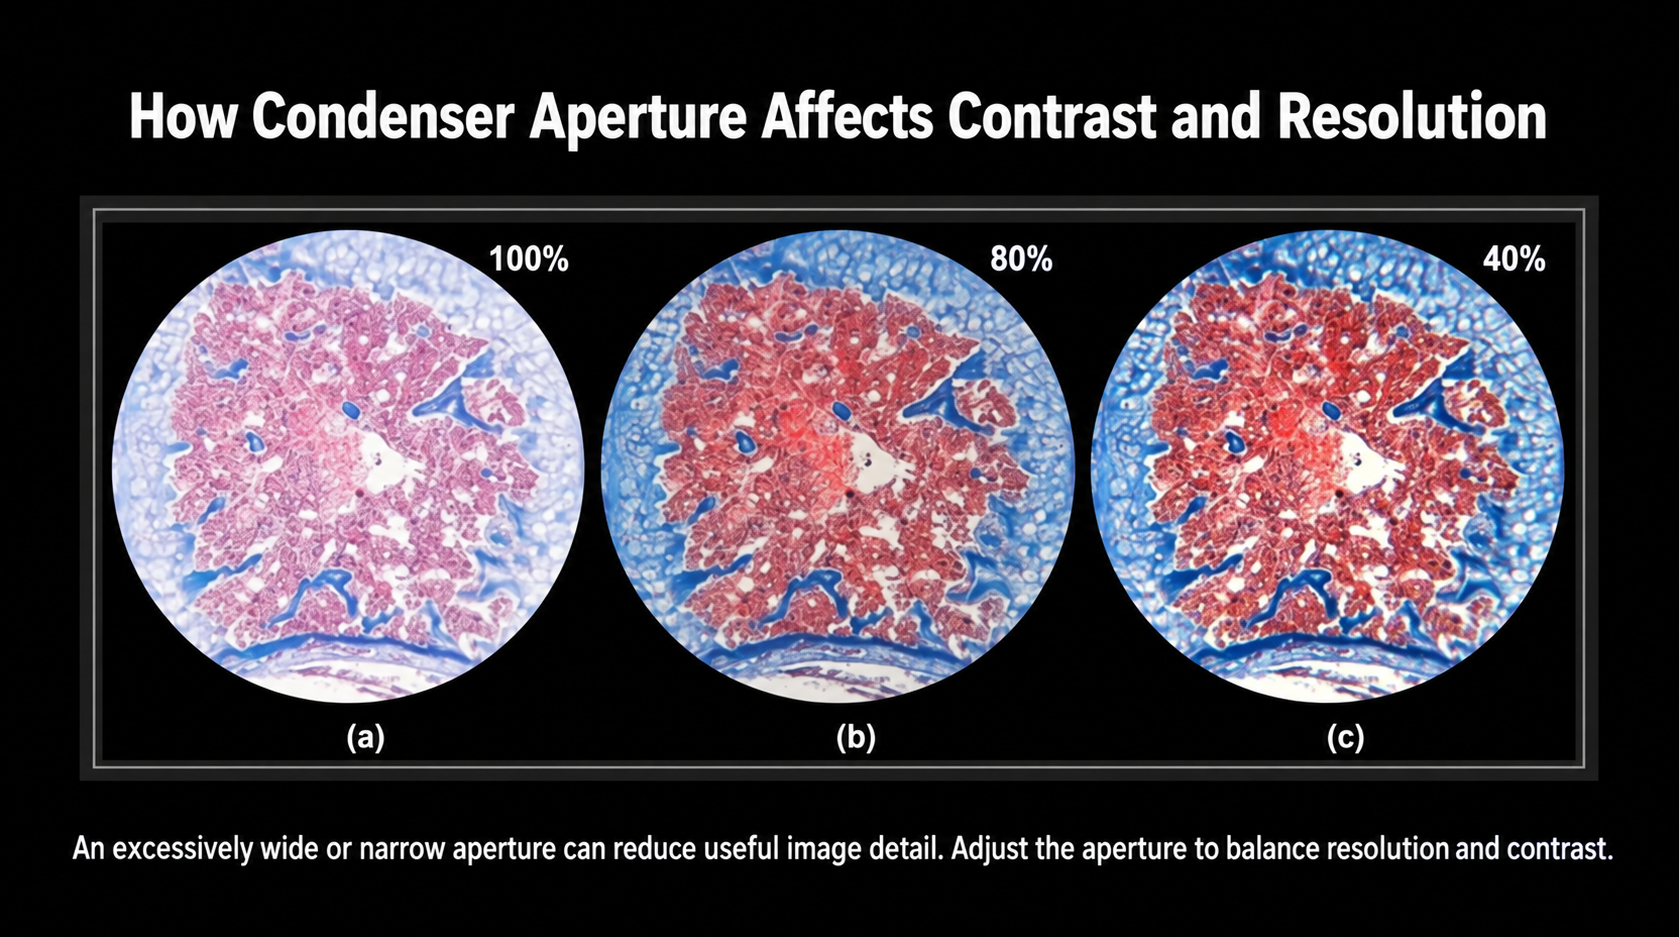
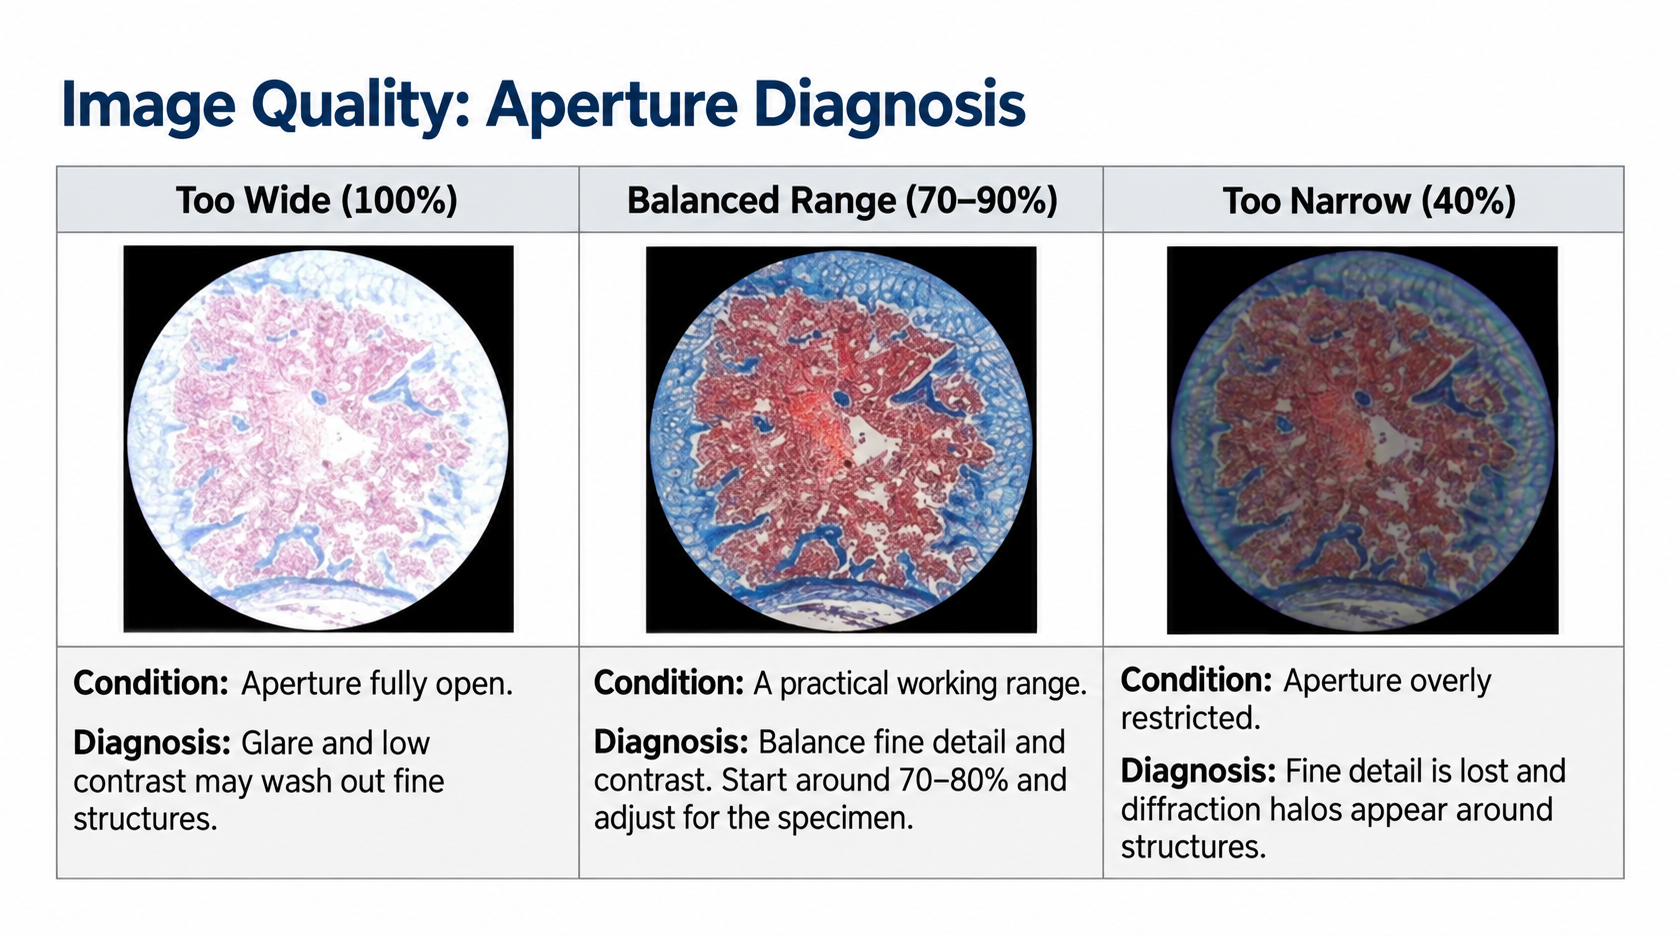
The original tutorial compares the same specimen at three aperture settings: approximately 100%, 80%, and 40%. The lesson is the balance between contrast and resolution. A wide aperture may make a weakly absorbing specimen appear washed out; an excessively small aperture can produce strong outlines while obscuring fine detail.
| Aperture condition | Typical appearance | What to do |
|---|---|---|
| Wide open: about 100% | Low contrast or a pale, hazy appearance may occur, especially when stray light is present. | Reduce the condenser aperture gradually and check that the field diaphragm is not excessively open. |
| Balanced: around 70–80% to start | Useful contrast with good fine-detail visibility. The tutorial illustrates an approximately 80% setting. | Fine-tune for the specimen. A wider setting can be useful when the task demands higher resolution. |
| Overly restricted: about 40% | Strong contrast, reduced fine detail, and conspicuous diffraction fringes or halos around structures. | Open the aperture until fine details become clearer and artificial edge effects decrease. |
These are diagnostic tendencies, not guarantees that a particular percentage will always produce the same image. If the image looks wrong, check illumination and diaphragm settings before concluding that the specimen or objective is defective.
 |
9. Use oil immersion for high-NA imaging
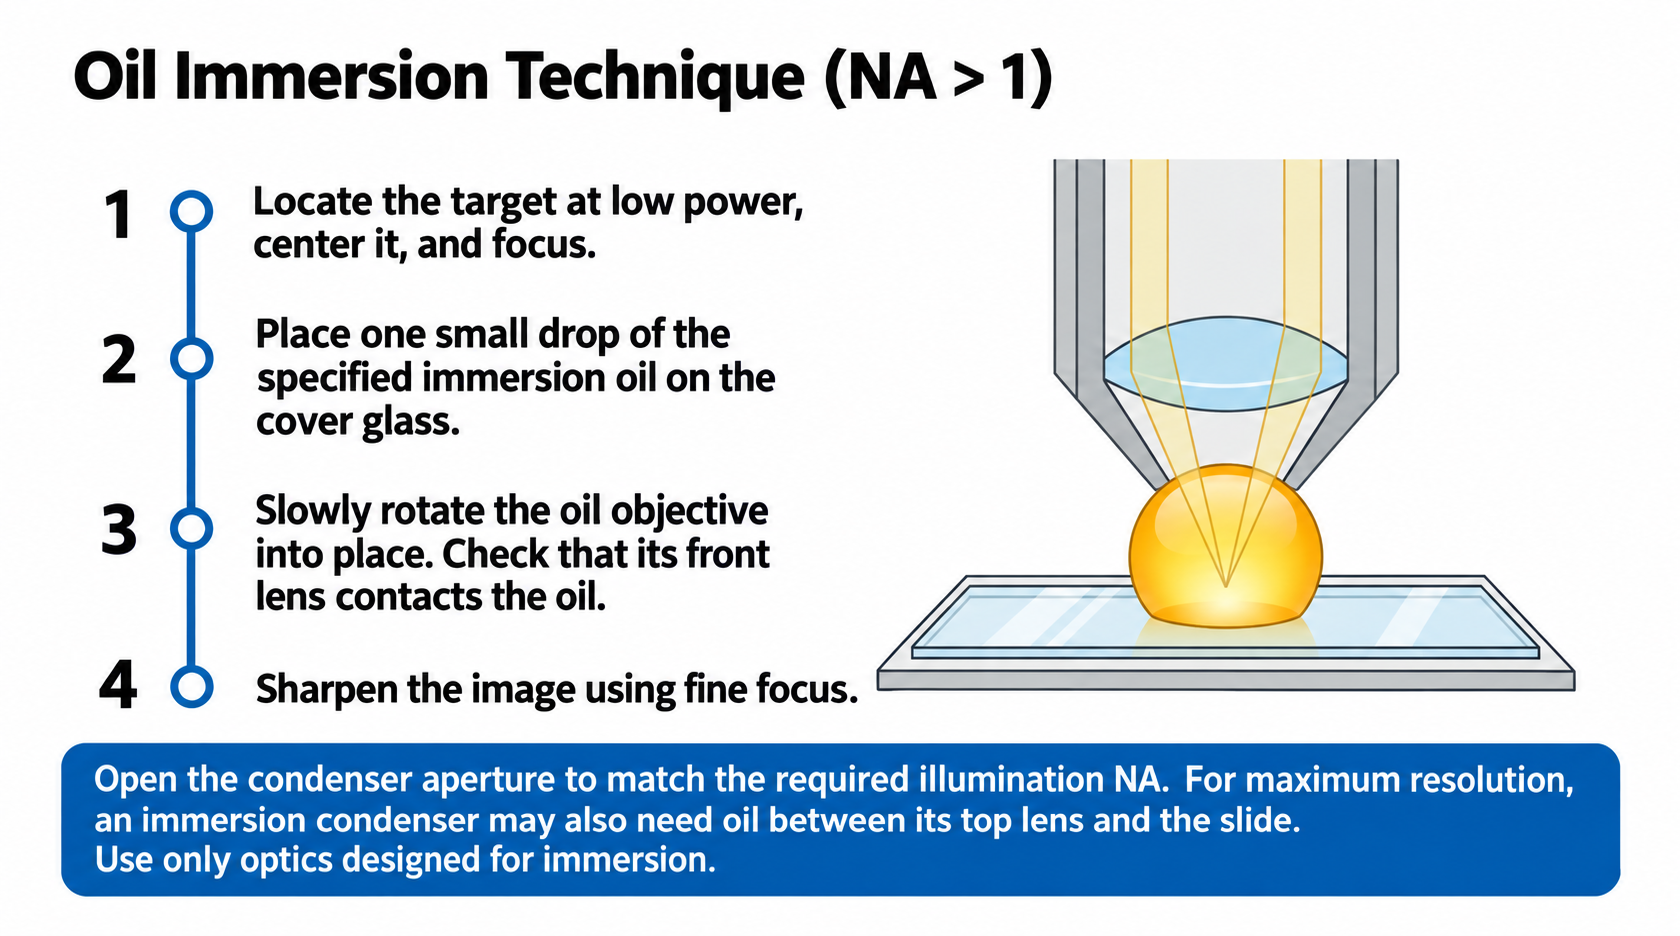
Oil-immersion objectives allow numerical apertures greater than 1 by replacing the air gap between the cover glass and objective with a suitable immersion medium. To obtain the intended performance, use the medium specified for that objective.
A practical four-step procedure
- Locate and center the target. Use a low-power dry objective to identify the region of interest and bring it into focus.
- Add a small drop of approved immersion oil. Place it on the cover glass above the observation area. Although the original tutorial mentions cedarwood oil, use the oil specified by the objective manufacturer; modern systems commonly use formulated immersion oils.
- Bring the oil objective into position. Rotate the nosepiece slowly and check from the side that the front lens makes contact with the oil. Keep dry objectives out of the oil.
- Refine with fine focus. Sharpen the image gently and recheck illumination. Avoid coarse focusing at the short working distance of a high-power oil objective.
Oil selection and refractive-index compatibility matter. ZEISS’s immersion-media guidance explains how the medium supports optical performance and why it must suit the application.
 |
Match the condenser to the required illumination NA
Open the condenser aperture sufficiently to support the high-NA objective. A fully open setting can be useful when maximum illumination NA is required, but it is not a universal rule for every oil-immersion image; inspect the aperture and optimize the balance of detail and contrast.
A condenser used dry typically provides a practical illumination NA of roughly 0.9, depending on its design. To use the higher illumination NA of a suitable immersion condenser, an oil connection may also be required between its top lens and the underside of the slide. Only oil a condenser designed for immersion, following its instructions.
Troubleshoot bubbles in the oil
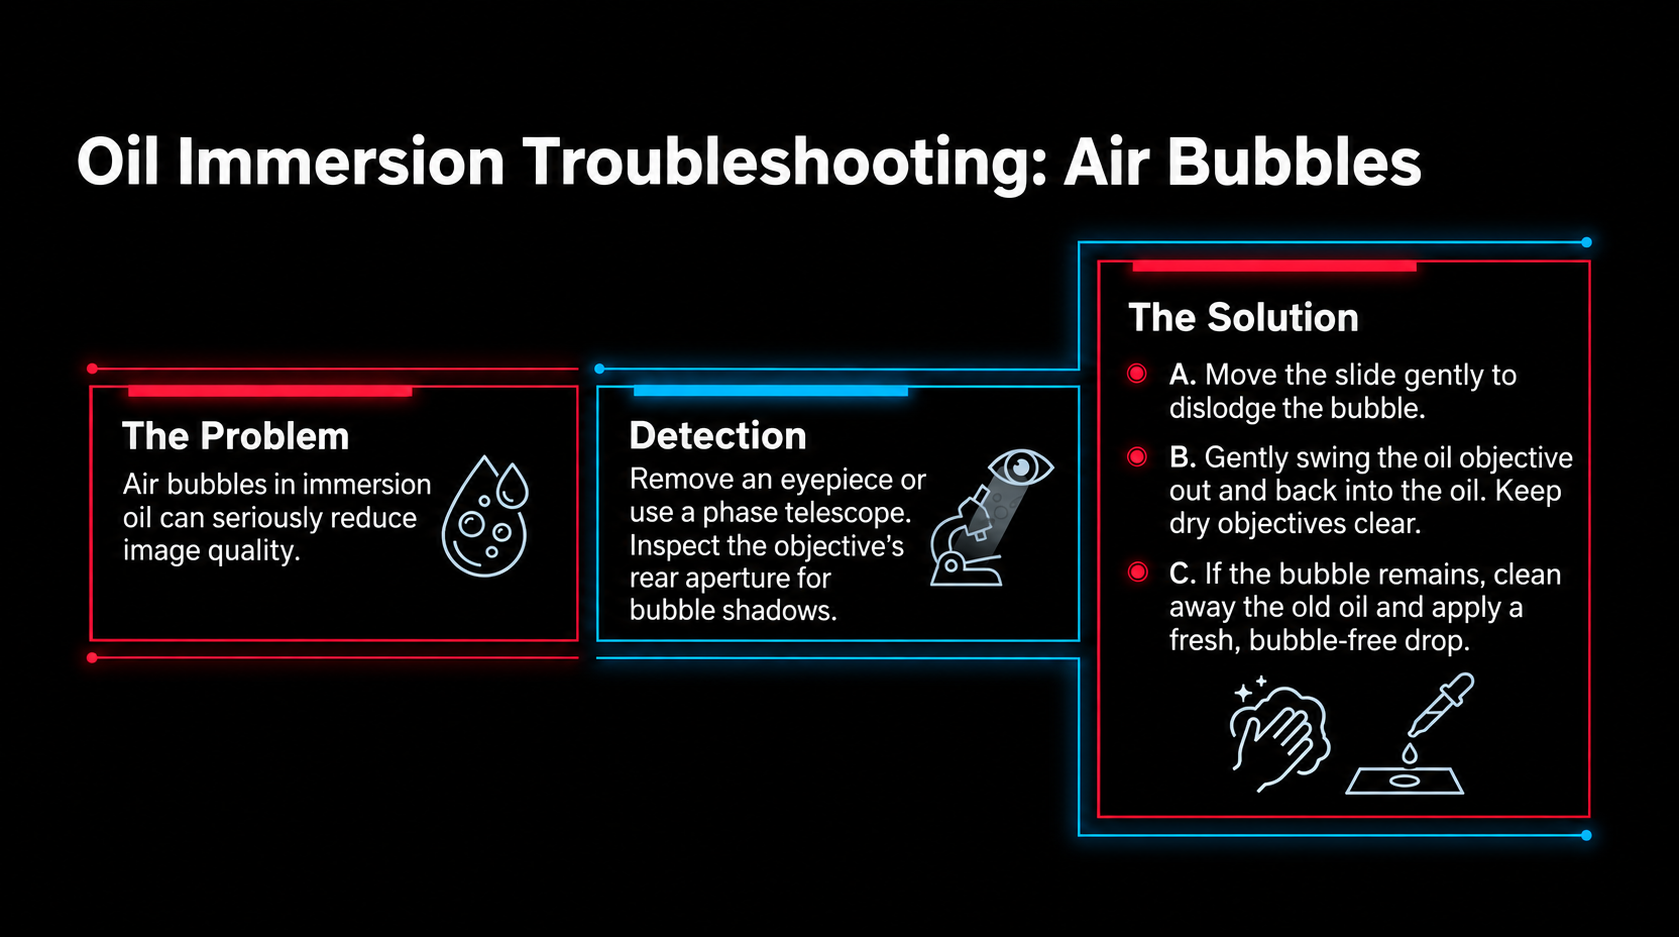
An air bubble in the immersion layer can markedly degrade the image. Inspect the objective’s rear aperture with an auxiliary telescope, or by removing an eyepiece, to look for bubble shadows or interruptions in the illuminated pupil.
- Try a small, controlled movement of the slide to dislodge the bubble.
- If appropriate for the instrument, gently swing the oil objective out and back into the oil, watching the clearance and avoiding contamination of adjacent dry objectives.
- If the bubble remains, clean away the oil from the objective and specimen using the recommended method, then apply a fresh, bubble-free drop.
After observation, remove immersion oil using lens tissue and a cleaning method compatible with the optics. Cleanliness is part of the imaging workflow, not just a storage task.
 |
10. Adjust the eyepieces for parfocal viewing
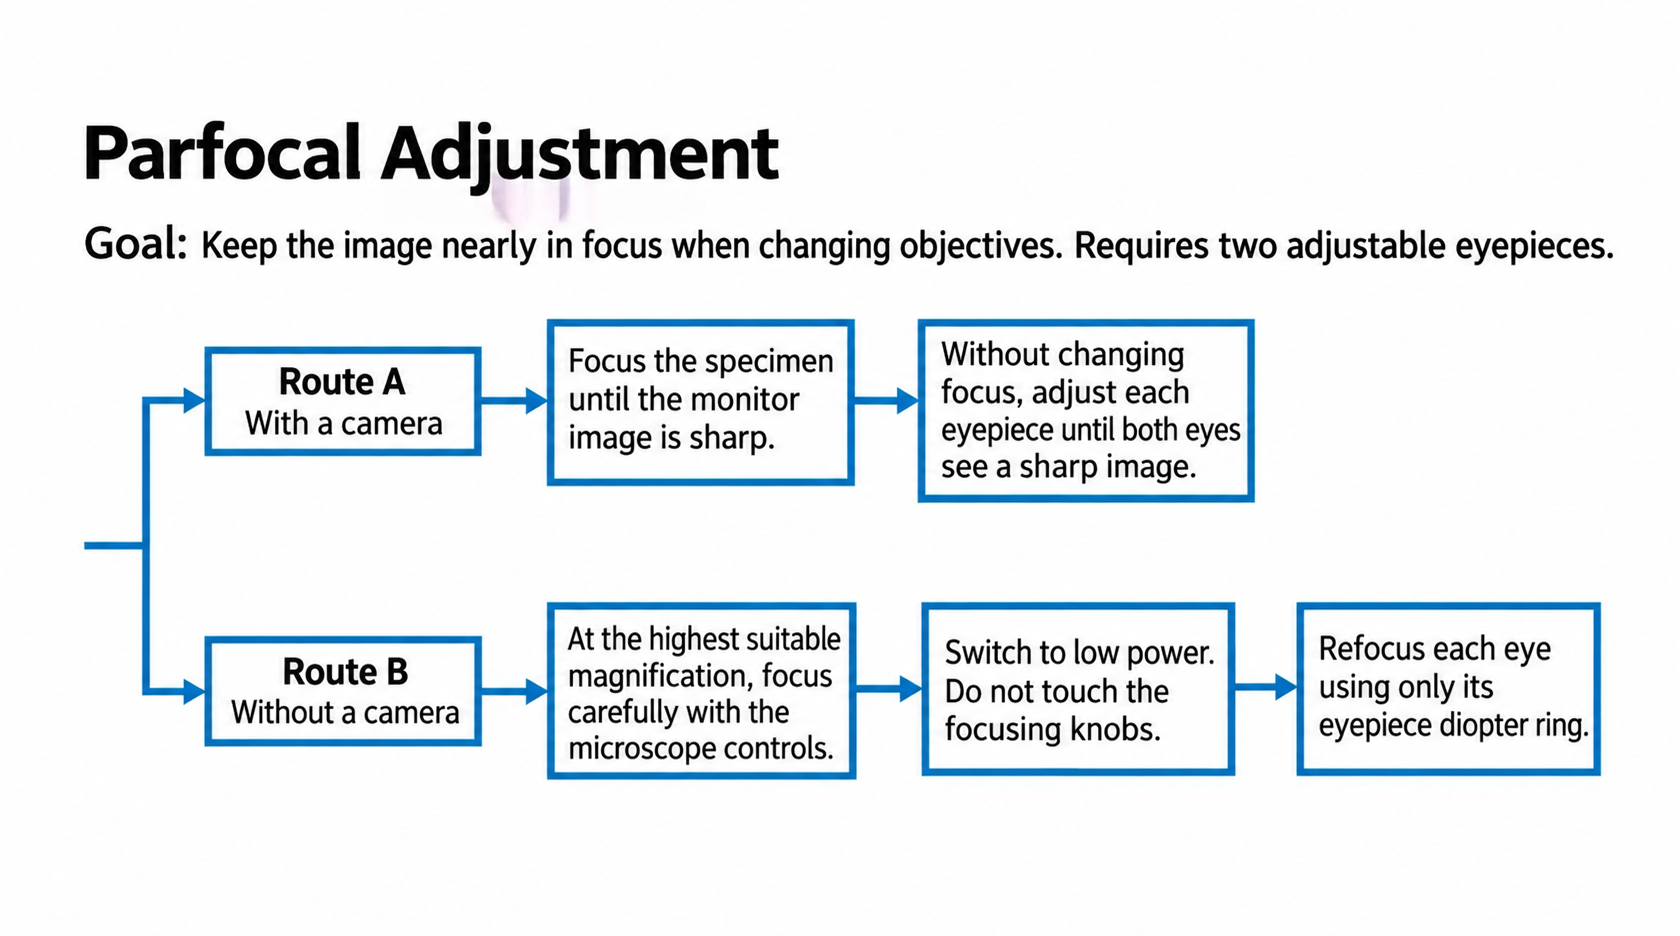
Parfocality means that a specimen remains approximately in focus when you change between compatible objectives. Correct eyepiece diopter settings help you take advantage of this, although a small fine-focus correction may still be needed.
The following two routes assume that both eyepieces are individually adjustable. They align viewing focus; they cannot correct incompatible objectives or a mechanical parfocality problem.
Route A: With an imaging camera
- Focus the specimen until its image is sharp on the computer display.
- Leave the microscope’s focus unchanged.
- Adjust each eyepiece’s diopter ring independently until the corresponding eye sees a sharp image.
- Check the result at another magnification. The camera adapter must be correctly set up for the camera and eyepieces to agree.
Route B: Without a camera
- Select the highest suitable magnification for the calibration, using the required immersion medium if applicable, and focus carefully with the microscope controls.
- Switch to the lowest suitable magnification. Keep dry objectives clear of any immersion oil.
- Do not touch the microscope’s focusing knobs. Restore sharpness separately for each eye using only the eyepiece diopter rings.
- Return to high power, check the focus, and repeat if necessary according to the instrument’s instructions.
The aim is a smooth transition between magnifications with minimal refocusing. If a large focus shift persists, check the objective set, eyepiece settings, and camera adapter rather than forcing the focusing mechanism.
 |
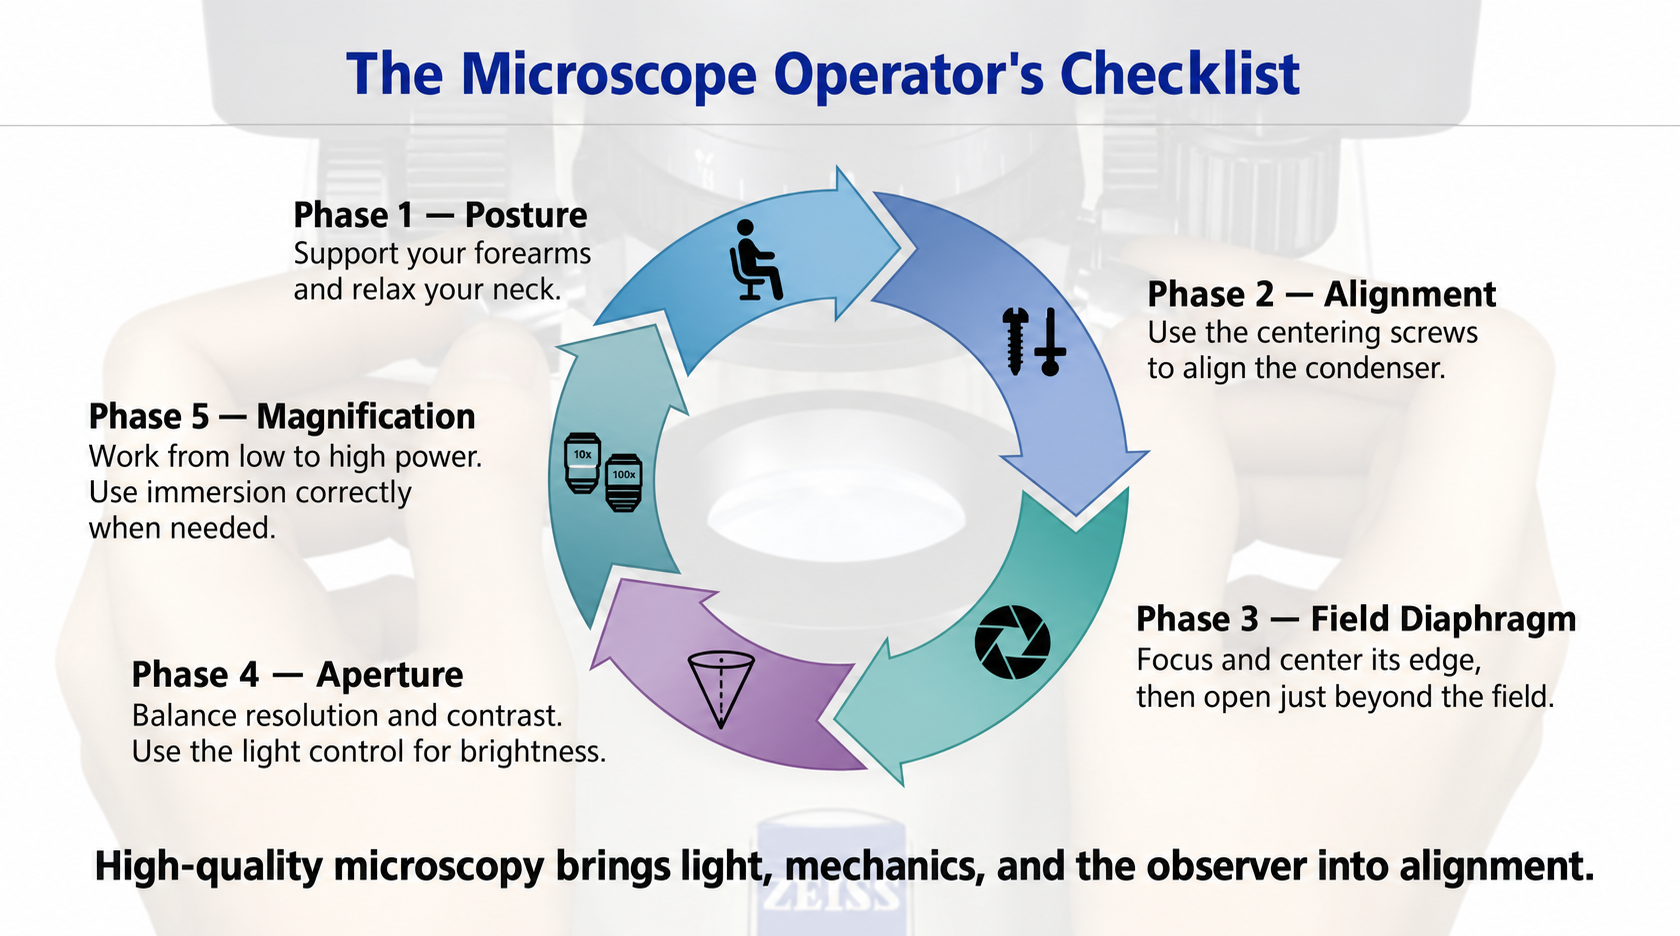
11. Make good setup a repeatable routine
Reliable microscope operation is a cycle of small checks. Repeat the relevant steps when changing the specimen, objective, or illumination configuration.
- Posture: Support your forearms, relax your neck, and keep the controls within reach.
- Alignment: Check the condenser and center the field-diaphragm image.
- Field: Focus the diaphragm edge, then open it just beyond the viewing or recording area.
- Aperture: Match the illumination cone to the objective and specimen; start around 70–80% for routine brightfield work and refine as needed.
- Brightness: Adjust the light source or neutral-density filtration after setting the optics.
- Magnification: Survey at low power, center the target, and progress to higher power.
- Immersion: Use the specified oil, inspect for bubbles, and clean the optics afterward.
- Viewing focus: Set the eyepieces correctly and verify that changing objectives requires only minimal refocusing.
High-quality microscopy depends on the coordinated operation of the illumination, mechanics, optics, and observer. Making these adjustments consistently turns a merely visible specimen into an image that reveals useful detail.
 |
For more inforamtion about Biological Microscope, please kindly visit our page: What Is a Biological Microscope? The Definitive Guide for Global Importers and Laboratories